
These are the key steps to follow to convince your friends and family that you are an astro-imaging wizard (even if you only know the basics):
I am assuming you have the following kit:
- An Equatorial Mount that can carry the scope plus camera. As a minimum a motor drive is needed for the Right-Ascension axis. Ideally you will have a GOTO setup with a handset.
- A scope! Of course this could lead to a long discussion… for now I suggest the main thing is that the focal ratio of the scope is F7 or faster (e.g. F6, F5). For deep sky objects you want to gather light in a time that is short enough so that the mount’s guiding doesn’t make stars into ovals or even worse into trailing lines. The scope’s aperture is less important than focal ratio – as witnessed by the results seen from scopes as small as 60mm. Longer ratio scopes can of course be used, but that might lead you down the road of autoguiding, which initially I suggest you avoid.
- A Digital SLR camera with a suitable T-ring and mount to connect the camera to the telescope focuser.

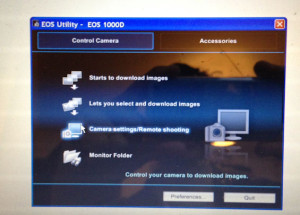
- A laptop or netbook and cabling to connect to your DSLR. Install software on it to enable capture of data from the camera. e.g. EOS Utility for Canon, View NX for Nikon. They are many more options including the use of Eye-FI memory cards, tablets or smartphones.
Preparation:
- Check the weather looks reasonable and that the Moon won’t spoil the show.
- Choose between one and three target objects which are compatible with your scope.
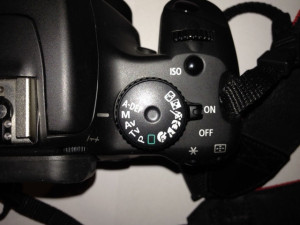
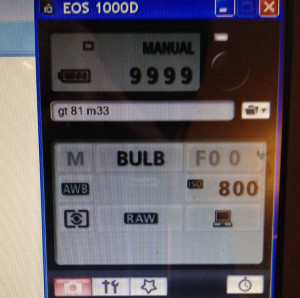
- Set the camera as follows (for Canon): Set Manual “M” on the rotary dial.
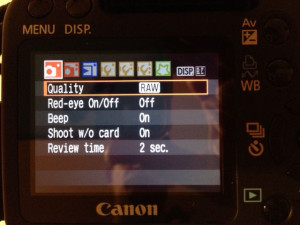
- Select MENU and set the Quality to RAW.
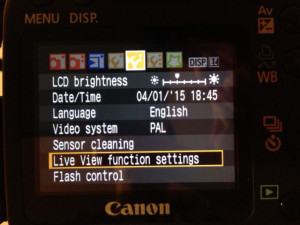
- Set the LIVE View function settings to ENABLE
- Set an appropriate ISO e.g. 800.
- On the laptop setup a Destination Folder for your images, and a filename header as well.
- Try a test exposure using the laptop to open and close the shutter.
- Check all batteries.
- Find warm clothes including a hat in winter.
- Find a working torch with a red lens.
- Get a flask if you can’t reach the kitchen during the imaging session.
In summary, get your kit together!

